Raffia crochet lampshades


Materials used:


How to:
Create a foundation row of 30
Join in the round
Row 1 - Single crochet into each stitch
When returning to the first single crochet stitch do not chain just go into the next row
Single crochet into the top loop of each stitch
Refer to photo 1.
Row 2- Single crochet the first 4, and on the 5th stitch single crochet twice into the 5th stitch.
Single crochet the next 4 then on the 5th single crochet 2 into that one as well. Continue this pattern of single crochet 4 and single crochet twice into the 5th stitch until you return to start of the row.
Rows 3, 4, 5 - Single crochet 3 more rows with no increases.
Row 6 - increase every 6th stitch - single crochet into the top loop of the first 5 stitches of the round. On the 6th stitch, single crochet two into the 6th stitch. Continue this pattern of single crochet one into the next 5 stitches then increase by 1 on the 6th.
Row 7 - single crochet one round no increases - stitch count around 40
Row 8 - increase every 7th stitch
Row 9 - single crochet one round no increases - stitch count around 46
Row 10 - increase every 8th stitch
Row 11 - single crochet one round no increase - stitch count around 50
Row 12 - increase every 9th stitch
Row 13 - single crochet one round no increase - stitch count around 55
Row 14 - increase every 10th stitch
Row 15 - single crochet one round no increase - stitch count around 60
Row 16 - increase every 11th stitch
Row 17 - single crochet one round no increase - stitch count around 65
Row 18 - increase every 12th stitch
Row 19 - single crochet one round no increase - stitch count around 70
Rows 20-25 - single crochet no increase
Place the shade over the cage and fit the shade in place - photo 2
After ensuring the shade fits the cage (if not you can add single crochet rows to the bottom as needed) remove the shade and sew the top strand into the inside of the shade.
Leave a tail of yarn around 180” long (be sure to leave some pulled through the last stitch so it doesn’t come out)
Thread the tail through your tapestry needle (I like to double mine over so it is half the actual length and easier to work with) then thread it through your last stitch to secure it in a knot
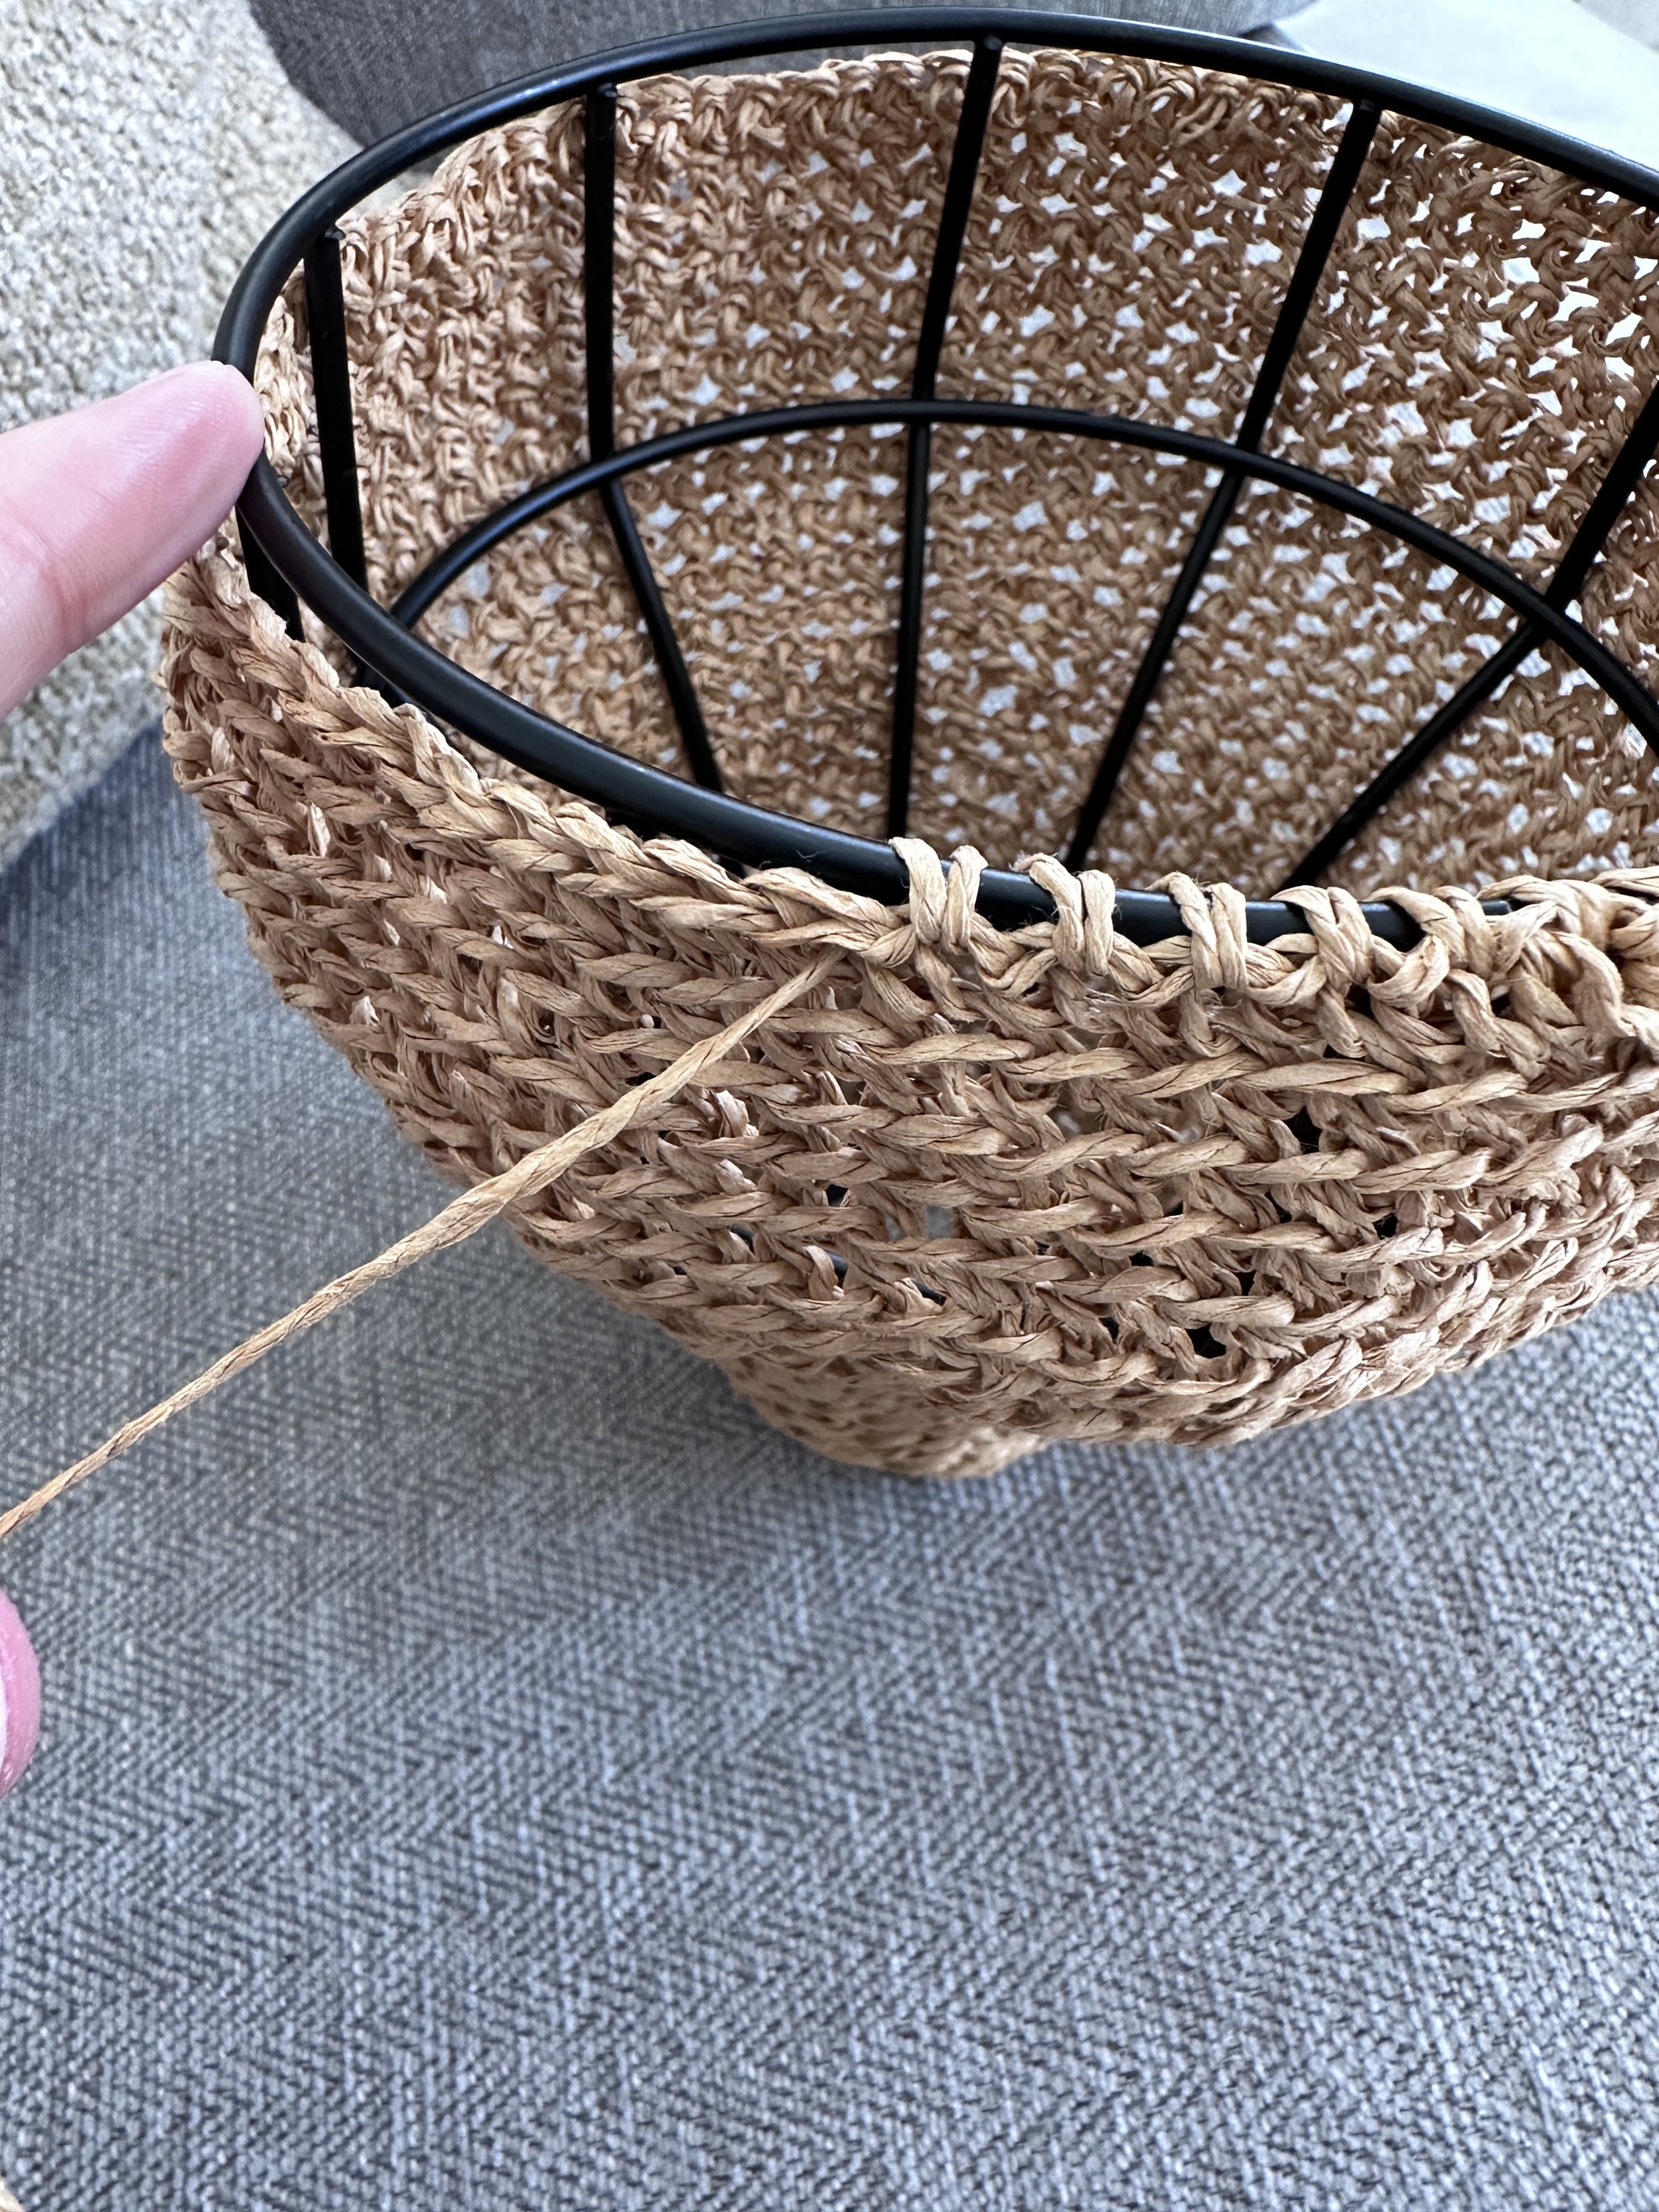
With your shade back fitted on the cage, thread the needle back to front, under the bottom wire of the cage, and go through both stitches of your next stitch and pull the yarn all the way through this stitch - picture 3
Thread the needle and yarn from back to front under the wire and through the stitch in the same way then move to your next stitch continue this all the way around securing the bottom of the shade around the bottom of the cage - picture 4
Once you have finished the threading you can take the thread into the inside of the shade and secure your end where it won’t show - picture 5
Now you have your finished lampshade and can fix it to any light you would like!
Disclaimer: I am not an expert in heat/flammability and would not recommend leaving any handmade item near sources of heat for extended periods of time. The materials exposed to heat are metal, rayon, and cotton.
I hope you enjoy your new lampshades!

2.

3.
4.

5.